Preservation Technique: Freezing Broth Flat for Easy Stacking
Freezing broth flat is a clever preservation technique that saves space and ensures easy portioning. This method is perfect for home cooks who want to stockpile homemade broth without sacrificing freezer real estate. By freezing broth in flat layers, you can stack multiple portions neatly and retrieve just what you need without thawing the entire batch. This technique also speeds up thawing times, making your cooking process more efficient. Whether you're a soup aficionado or just looking to preserve your culinary efforts, freezing broth flat is a game-changer. It's simple, requires minimal equipment, and results in perfectly portioned broth whenever you need it. This guide will walk you through the process step-by-step, ensuring your frozen broth is ready for any recipe. Understanding the science behind this technique is key—freezing broth in thin layers reduces the surface area exposed to air, minimizing freezer burn and preserving flavor. With a few tips and tricks, you'll be a broth-freezing pro in no time.
Notes
Freezing broth flat works because thin layers freeze and thaw more quickly than large volumes, reducing the risk of ice crystal formation that can degrade texture. To avoid freezer burn, ensure your containers are airtight and minimize air contact. Common mistakes include not cooling the broth fully before freezing, which can lead to bacterial growth, and failing to leave space for expansion, potentially causing containers to burst. For safety, always check for freezer burn or off odors before use. Frozen broth can be stored for up to 3 months for optimal flavor. For make-ahead convenience, label and freeze broth portions based on your usual recipe requirements. This method is ideal for batch cooking and meal prep enthusiasts.
Steps
- 1 Cool the broth completely to room temperature.
- 2 Label freezer-safe bags or containers with the date and type of broth.
- 3 Pour the broth into the bags or shallow containers, leaving a 1-inch gap for expansion.
- 4 Seal the bags carefully, pressing out as much air as possible.
- 5 Lay the bags flat on a baking sheet, ensuring they lie flat without folding.
- 6 Place the baking sheet in the freezer.
- 7 Freeze for 4-6 hours or until solid.
- 8 Stack the frozen broth portions neatly in your freezer for storage.
- 9 For containers, cover with lids once frozen solid and stack.
- 10 To thaw, remove the portion you need and place it in the refrigerator overnight.
- 11 Alternatively, submerge the sealed bag in cold water for quicker thawing.
- 12 Use thawed broth immediately for best quality.
- 13 Avoid refreezing thawed broth to maintain safety and flavor.
Ingredients to explore
Recipes to try

Pumpkin Spice Cheesecake Swirl Brownies
Indulge in the cozy combo of fudgy brownies with a creamy pumpkin cheesecake swirl - autumn's dream dessert come to life.
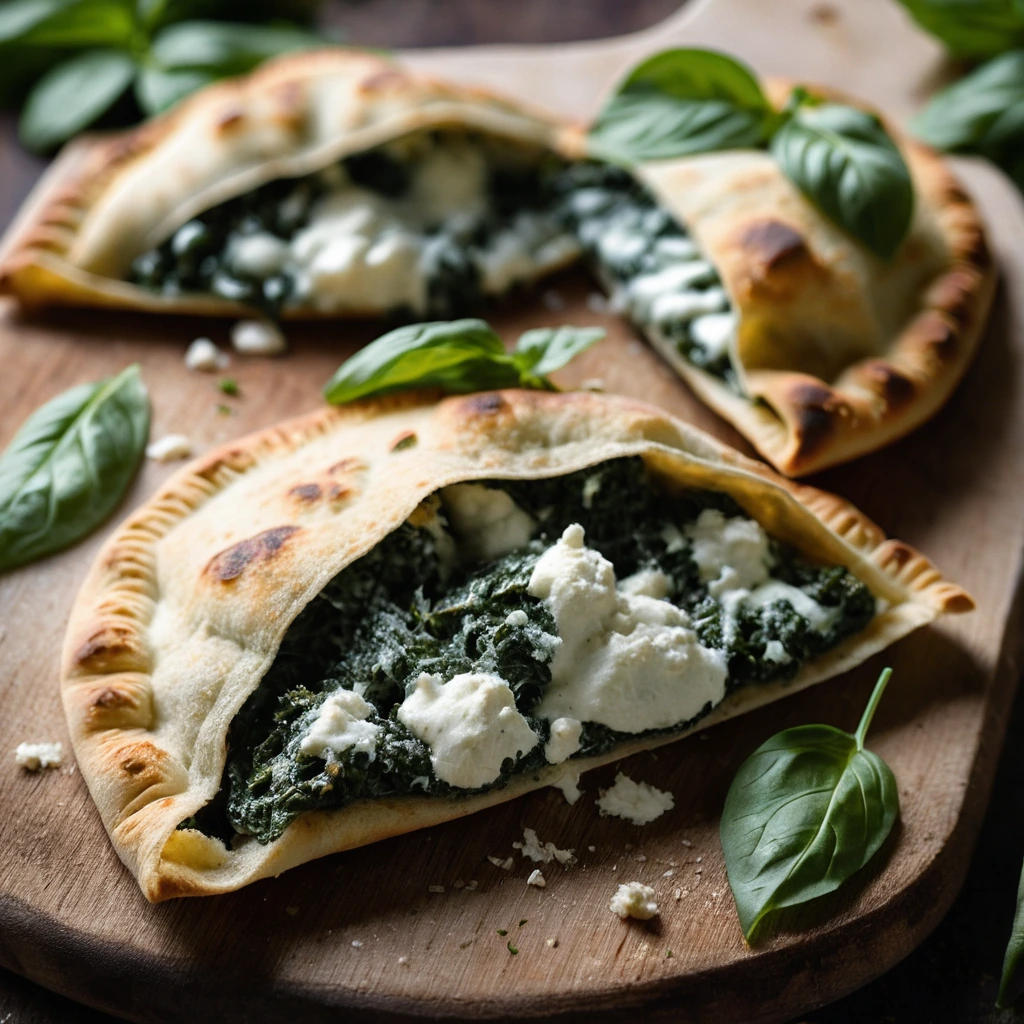
Spinach and Ricotta Stuffed Pizza Pockets
Golden, crispy pockets filled with a creamy ricotta and spinach blend that'll have you reaching for seconds.