Bread: Working with High-Hydration Doughs
High-hydration doughs are the secret to creating bread with an open, airy crumb structure and a chewy, flavorful crust. These doughs, with their water content often exceeding 70% of the flour weight, require special handling to maximize their potential. The increased moisture allows for greater gluten development, which in turn traps more gas during fermentation, leading to a lighter loaf. However, handling high-hydration doughs can be tricky due to their stickiness and tendency to spread. This technique will guide you through the intricacies of working with these doughs, from mixing to baking, ensuring your bread is a success. We'll explore the science behind high-hydration doughs, discuss proper kneading and shaping techniques, and provide tips for managing stickiness without compromising texture.
Notes
The science behind high-hydration doughs lies in their ability to develop a robust gluten network due to the increased moisture. This network is essential for capturing carbon dioxide produced by yeast during fermentation. A common mistake is overworking the dough, which can lead to a dense, rather than airy, structure. To troubleshoot stickiness, use bench flour sparingly and wet your hands when shaping. Safety is crucial when handling hot Dutch ovens; always use oven mitts. For make-ahead convenience, you can shape and proof the dough a day in advance, storing it in the refrigerator until you're ready to bake.
Steps
- 1 Measure out your ingredients precisely, ensuring your flour is weighed rather than volume-measured.
- 2 Combine flour and water in a large bowl or stand mixer, mixing on low speed until no dry flour remains.
- 3 Add salt and yeast, continuing to mix until the dough forms a shaggy mass.
- 4 Knead the dough using the stretch and fold method for about 8-10 repetitions over 30-60 minutes.
- 5 Cover the dough with plastic wrap and let it rest at room temperature for bulk fermentation, approximately 4-6 hours, until doubled in size.
- 6 Perform a series of gentle folds to strengthen the dough structure before shaping.
- 7 Shape the dough into a round or oval loaf, placing it seam-side up in a well-floured banneton or bowl.
- 8 Proof the dough in the refrigerator for 8-12 hours to allow for a slow, controlled rise.
- 9 Preheat your oven to 475°F with a Dutch oven or baking stone inside.
- 10 Turn the dough out onto parchment paper, score deeply with a sharp blade, and transfer to the preheated pot or stone.
- 11 Bake covered for 20 minutes, then uncover and bake for another 20-25 minutes until deep golden brown.
Ingredients to explore
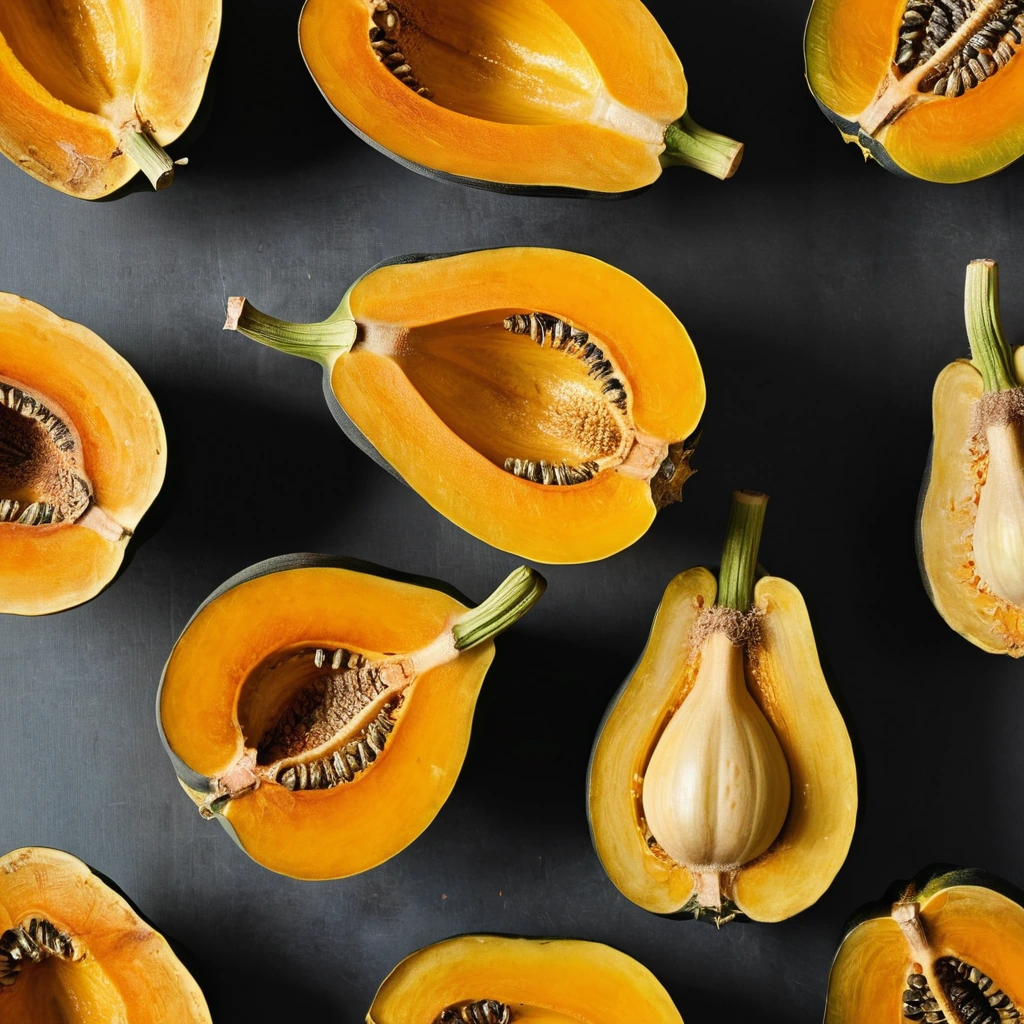
Acorn Squash
Acorn squash is a winter squash variety known for its distinctive teardrop shape and deep ridges resembling the texture of an acorn shell. Originating in the Americas, it has been cultivated for centuries and is a staple in autumn cuisine. The flesh is sweet and nutty with a hint of earthiness, offering a delightful contrast to savory dishes. Its texture is dense yet tender when cooked, making it ideal for roasting or pureeing. In cooking, acorn squash holds its shape well and absorbs flavors from herbs and spices, enhancing both its taste and versatility in recipes.
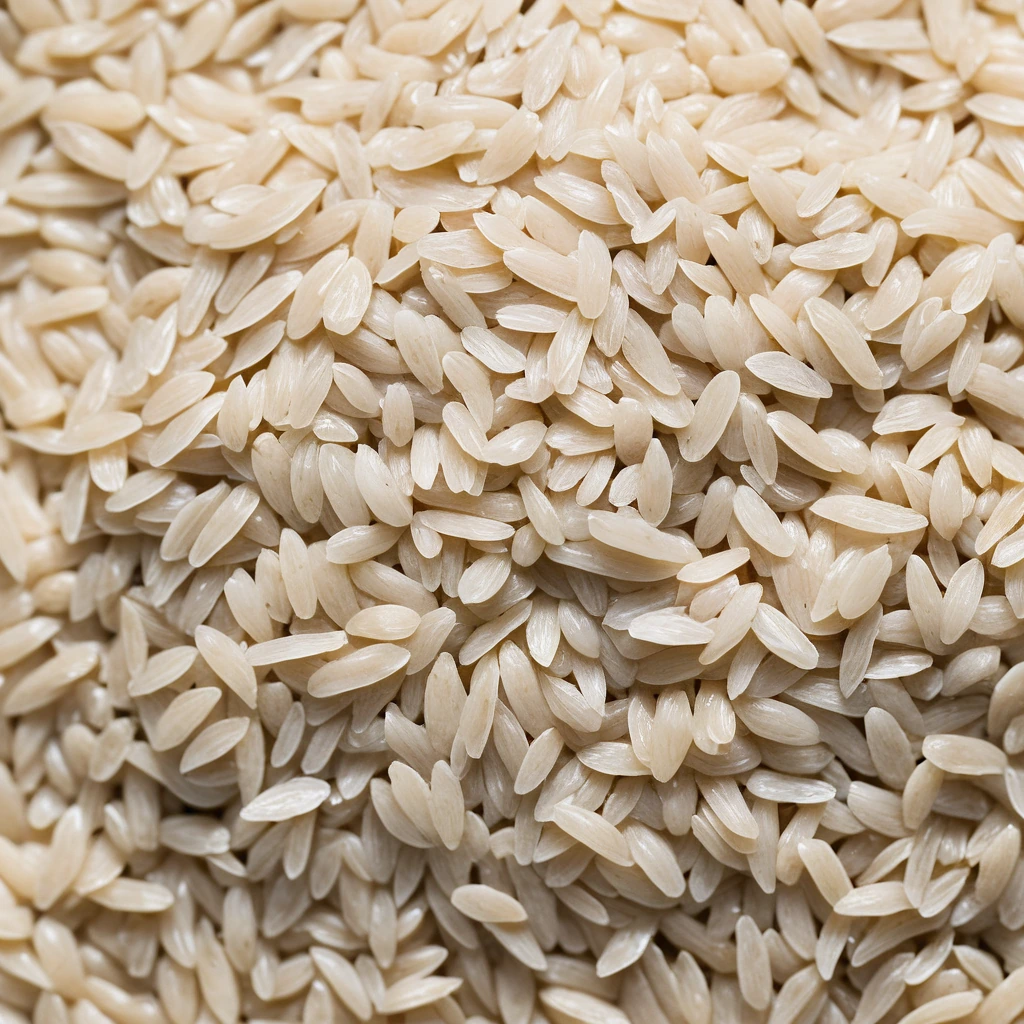
Arborio Rice
Arborio rice is a short-grain Italian rice variety renowned for its use in risotto. Originating from the Po Valley in Northern Italy, it is a staple in Italian cuisine. Its flavor is mild and nutty, with a pleasant creamy texture when cooked due to its high amylopectin content, which releases starch and creates a velvety consistency. The grains remain plump and firm to the bite, offering a satisfying chewiness. In cooking, Arborio rice excels at absorbing flavors from broths and seasonings while maintaining its shape, making it ideal for dishes that require both creaminess and structure.
Recipes to try
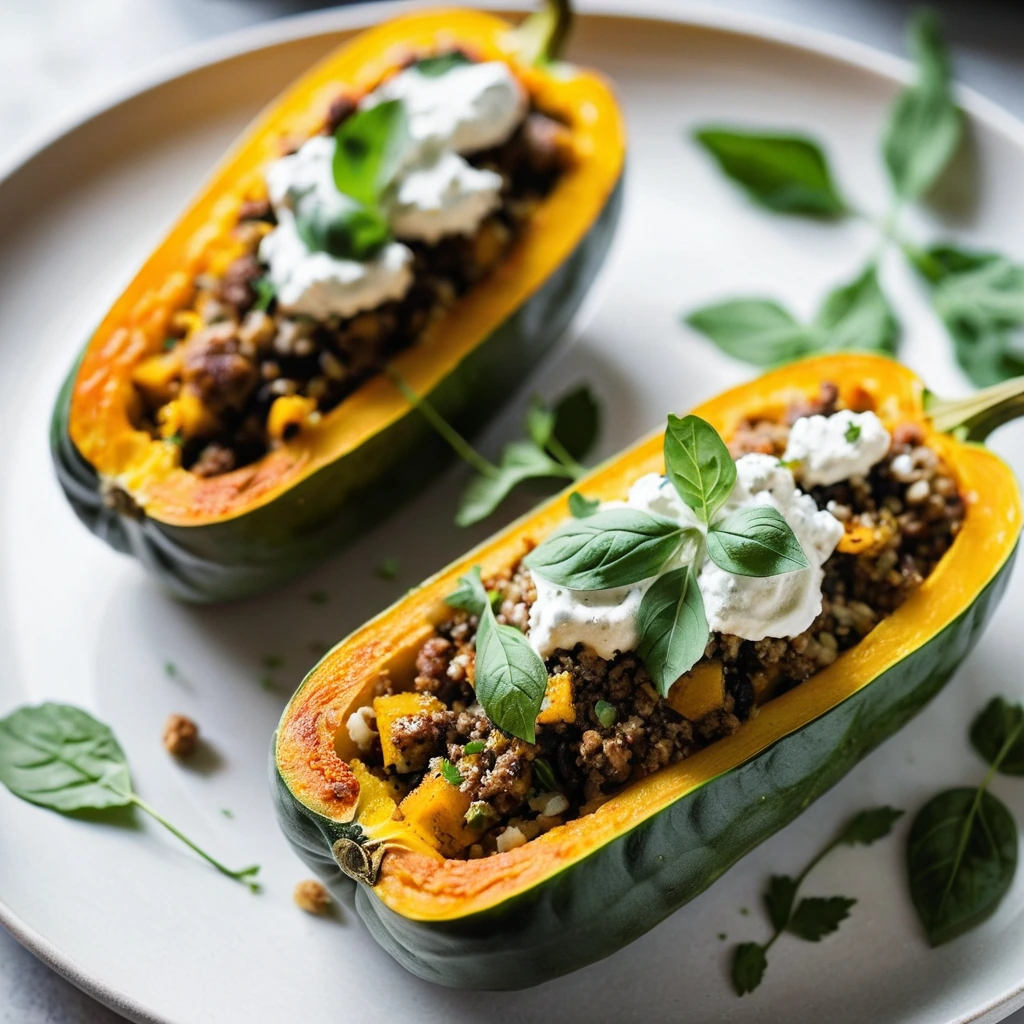
Sausage and Ricotta Stuffed Squash Boats
Tender roasted squash halves are stuffed with a savory mix of Italian sausage and creamy ricotta, making for a comforting and hearty meal.
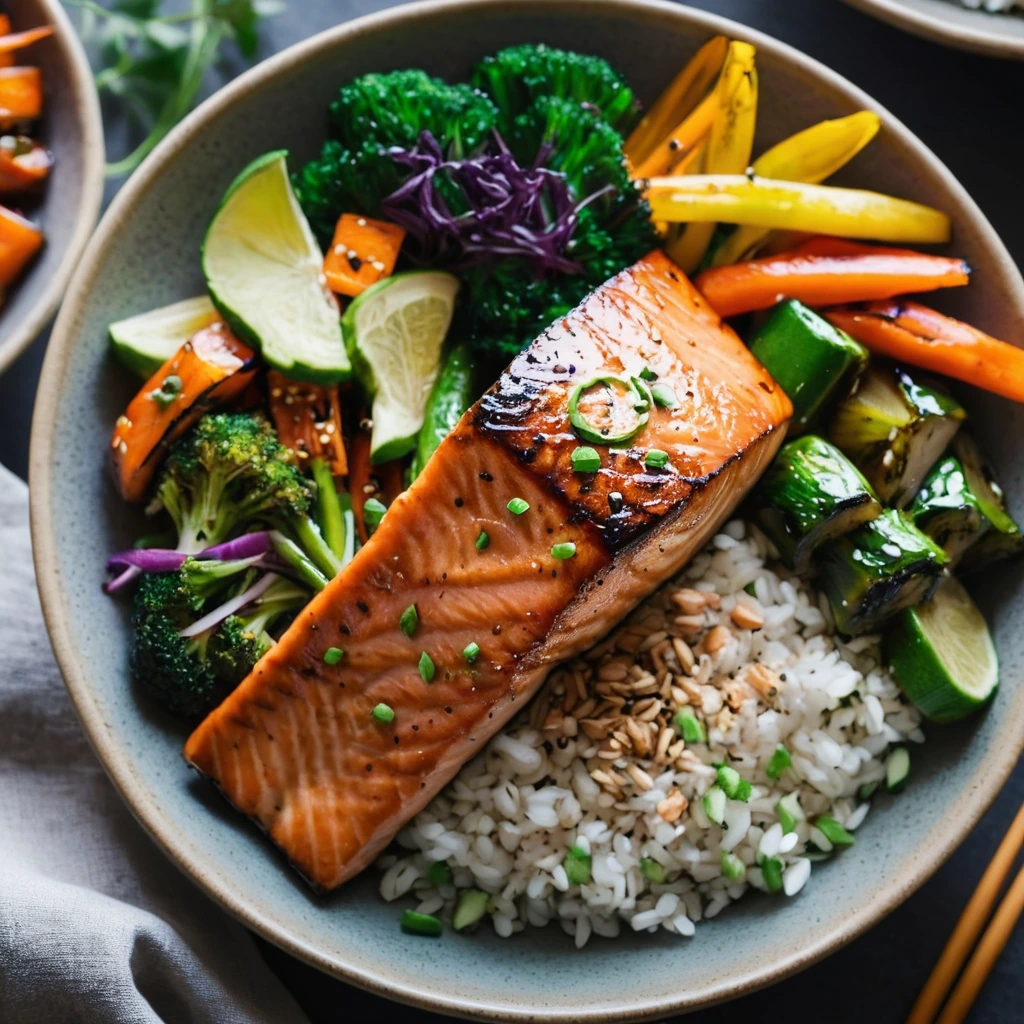
Teriyaki Glazed Salmon and Veggie Bowls
Sweet and savory teriyaki glaze coats succulent salmon fillets atop a vibrant medley of colorful veggies, creating a symphony of flavors in every bite.